
This post may contain affiliate links. Please read our disclosure policy.
This no-bake rainbow icebox cake is the perfect easy to prepare dessert. Only five ingredients are needed to make this fun sweet treat!
As I was lying in bed the other night, the idea for this Rainbow Chips Ahoy dessert popped into my head.
God knows why… but I went with it. Not then and there, mind you. I had to give it some thought and actually go out and buy the ingredients and stuff. Duh.

I spent some time researching whether Rainbow Chips Ahoy actually exist in the U.S. because most of the kind souls who read this blog are American, and I try not to put up completely useless recipes.
I grew up with these yummy cookies here in Canada. It looks like they do exist in the States, but they’re called Chips Ahoy Candy Blasts. Don’t ask me why the name is different.
When I was little, I could devour half a pack of these babies no problem before my mom would confiscate them. Now try taking this icebox cake away from me. I dare you.
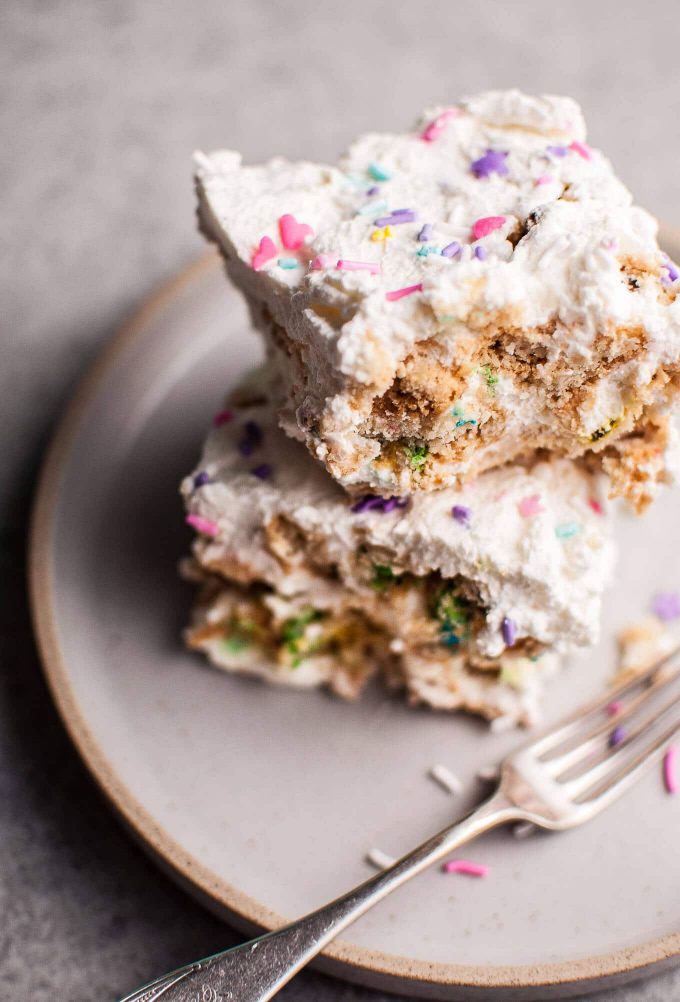
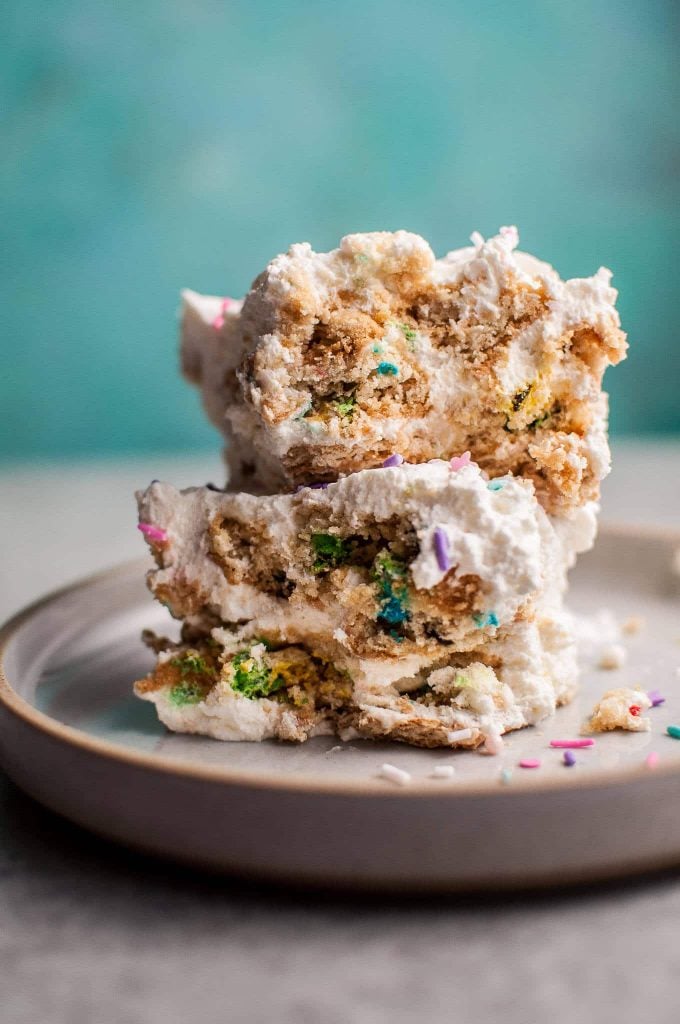
Icebox cakes are no new thing (fridges have since been invented), but I am sure glad they exist. Whip some cream and then spend a few minutes building layers, and you’re good to go. The hard part is waiting for the fridge to do its magic. No oven necessary.
This cake is one of those things that pleases crowds but are so easy to cobble together. Think kids’ birthdays, potlucks, BBQs… etc. Or just because you feel like it. Why not?
Will you try this Rainbow Chips Ahoy cake? Have you ever made an icebox cake?

Rainbow Chips Ahoy Cake
Ingredients
- 1 teaspoon pure vanilla extract
- 3 cups whipping cream (will make 6 cups when whipped)
- Graham crackers
- 1 package Rainbow Chips Ahoy/Candy Blasts
- Rainbow sprinkles (optional)
Instructions
- Make the whipped cream by beating the cream and vanilla extract together until it's fluffy/has soft peaks (use a hand mixer, stand mixer, or a whisk and some elbow grease). Using a spatula, divide the cream into four sections in the bowl (those will be your layers).
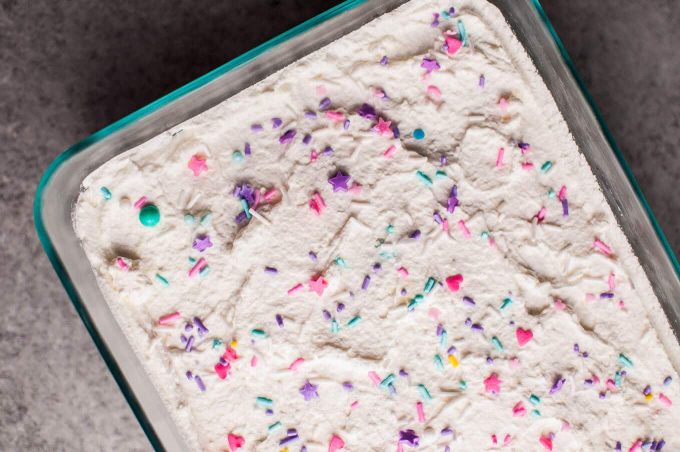
- Add a really thin layer of whipped cream to the bottom of the baking dish. Add a layer of graham crackers on top (you make need to break some up to fit).
- Add cream on top of the graham crackers then 1/3 of the rainbow cookies (I break them into smaller pieces). It doesn't have to be perfect and it's ok if there are still some small gaps. Feel free to fill in any gaps with leftover graham crackers. Repeat this process until you've used all the cookies and are left with a layer of whipped cream on top.
- Garnish with rainbow sprinkles if you're really into color like I am.
- Cover and refrigerate for at least four hours prior to serving (or overnight). I suggest eating this within 2-3 days or else it does get soggy.
Notes
- I used a glass Pyrex dish that's slightly larger than an 8x8. I wouldn't use anything smaller than an 8x8 with the quantities given.
- In Canada, Rainbow Chips Ahoy come in a 300g/10.6 ounce package. It appears that the Chips Ahoy Candy Blasts package is 12.4 ounces in the USA. Either would work. This cake isn't an exact science 🙂
© Salt & Lavender Inc. Content and photographs are copyrighted. Sharing this blog post is much appreciated, but copying and pasting full recipes without authorization to social media is strictly prohibited.


What a fun and creative dessert! As a kid growing up in the States, I remember them being called ‘Rainbow Chips Ahoy’ (of course that was awhile ago), I suppose they renamed them for marketing/re-branding purposes 😉 Well whatever they’re called these days, they sure do make a lovely icebox cake!
Thanks Kathleen! That is interesting re: the re-naming. I’m learning so much about these cookies now haha.
This sounds so tasty! Pinned for future reference … love your photos, by the way!
Thanks Sara!! I ate way too much when I made it haha.
Love this Natasha.
I’m not sure we have rainbow chips ahoy in the UK, but I’m on the look out for them now!
I’d be curious to know if you guys do have them!
OMG Natasha, this looks unreal!!!! You know, no one ever gave me a cake for my birthday this year. I’m sending my family this recipe!! 😉
Haha thanks Taylor 🙂