This post may contain affiliate links. Please read our disclosure policy.
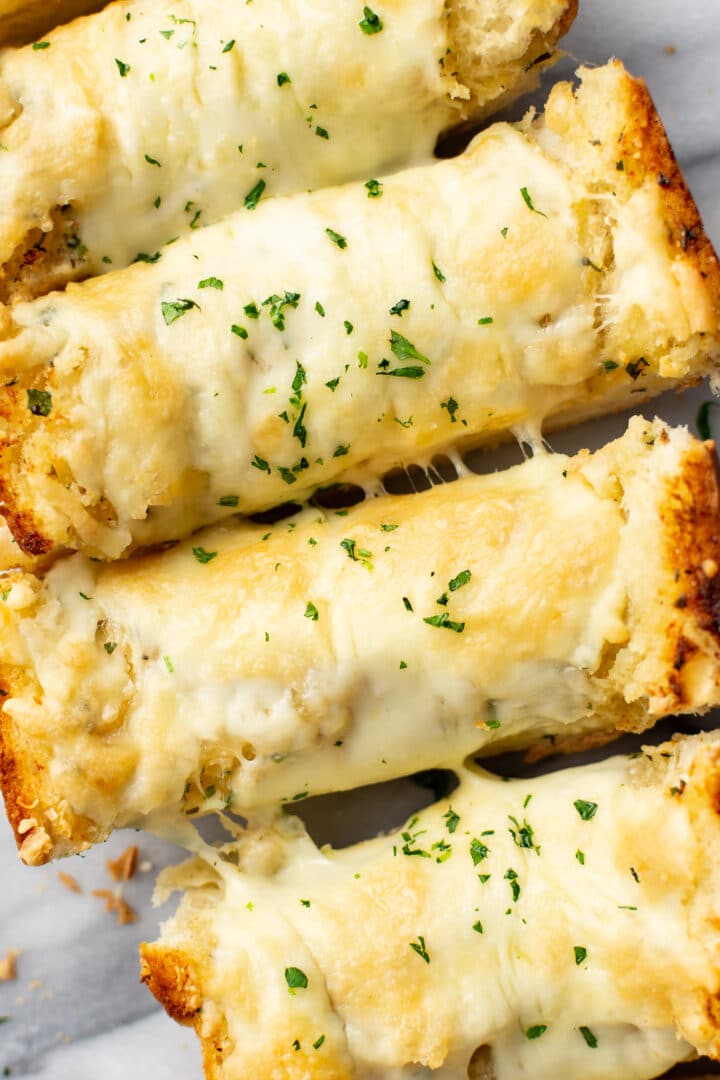
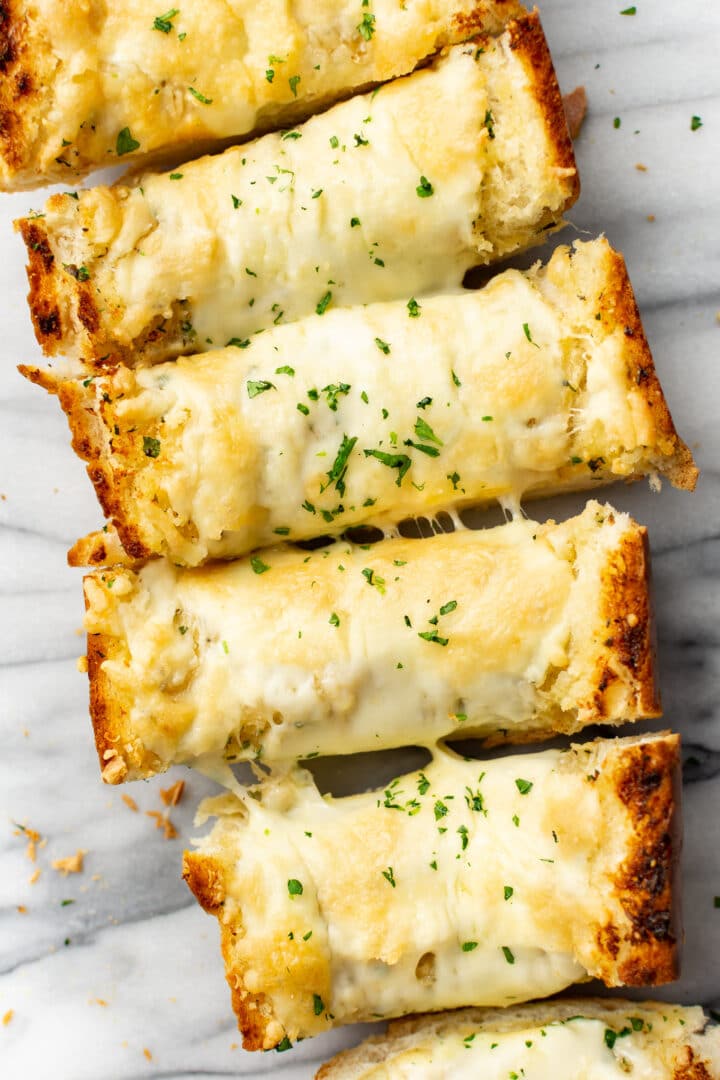
This buttery, perfectly toasted, extra cheesy garlic bread recipe is loaded with parmesan and mozzarella. It’s so much better than store-bought!
Try my Pepperoni Pizza Dip and Pepperoni French Bread Pizza as well.
Why you’ll love it
Is there anything better than homemade garlic bread? All in a single bite you get the crunch of the crispy, warm bread, followed by tons of gooey golden cheese, and then you reach the soft inside with a layer of the garlic herb butter that has melted into every crevice.
You know when the bread is so good that you end up eating so much that you’re too full to actually eat the rest of the meal? Yeah, we’re sorry (not sorry). It’s going to happen with this garlic bread with cheese recipe. Just embrace it. No regrets. And it has very little prep!
What you’ll need
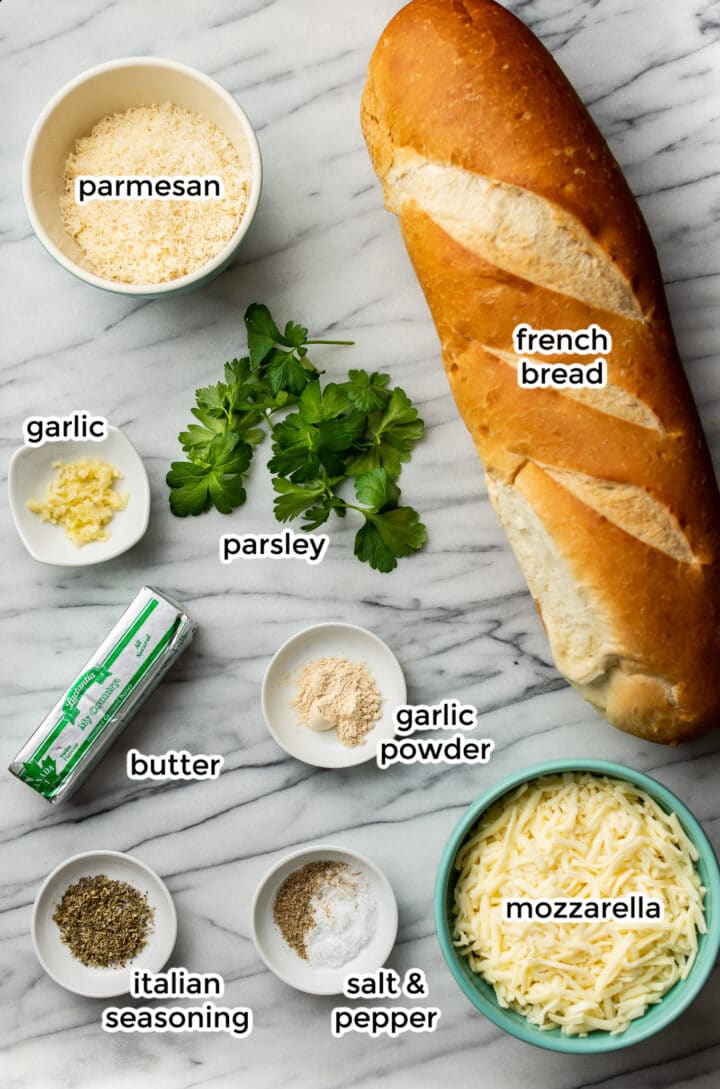
- Bread – French bread is the usual variety since it has a lot of surface area for the delicious toppings. The most important thing is that it’s fresh. Ideally, make this recipe the same day as purchasing your loaf.
- Garlic butter spread – our signature recipe has butter, both fresh garlic and garlic powder for extra savory goodness, Italian seasoning, parsley, and salt & pepper
- Cheese – we’re using both parmesan and mozzarella cheese to take it to the next level. Always grate your own!
Pro tip
Be sure the butter is at room temperature! This makes the recipe go really smoothly. Let it sit on your counter for at least an hour prior to starting the recipe.
Make ahead tips
- You can prep it to just before the baking stage, wrap it tightly in foil, and then refrigerate overnight or freeze it for a couple of months.
- If garlic bread is coming straight from the freezer, you can bake it from frozen. Try a temperature of 375F, and give it an extra 10-15 minutes in the oven than indicated in the instructions.
How to make garlic bread
This is an overview with step-by-step photos. Full ingredients & instructions are in the recipe card below.
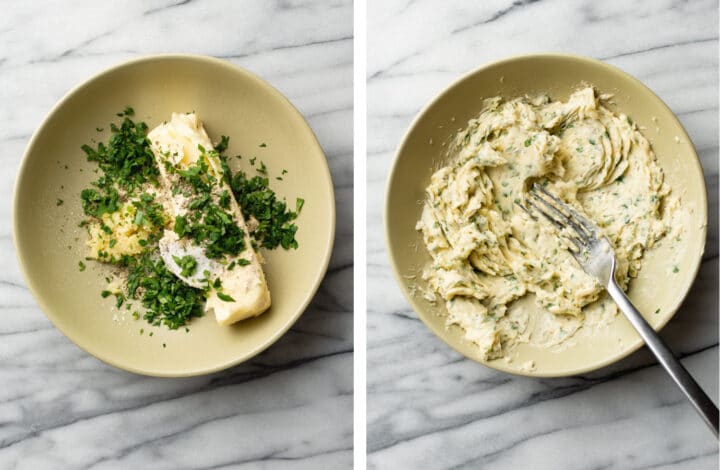
Take the butter out of the fridge so it comes to room temperature and becomes soft. Preheat the oven. In a small bowl, mash together the ingredients for the butter spread with a fork.
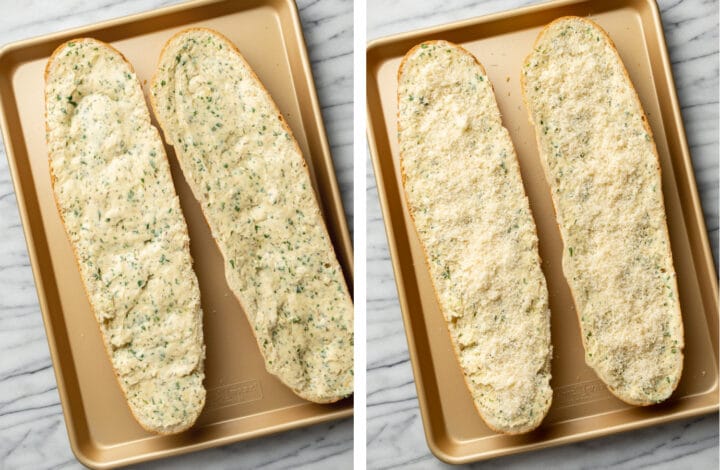
Cut the loaf in half horizontally, and place face-up on a baking tray. Spread the garlic butter mixture evenly, and top with the grated parmesan cheese.
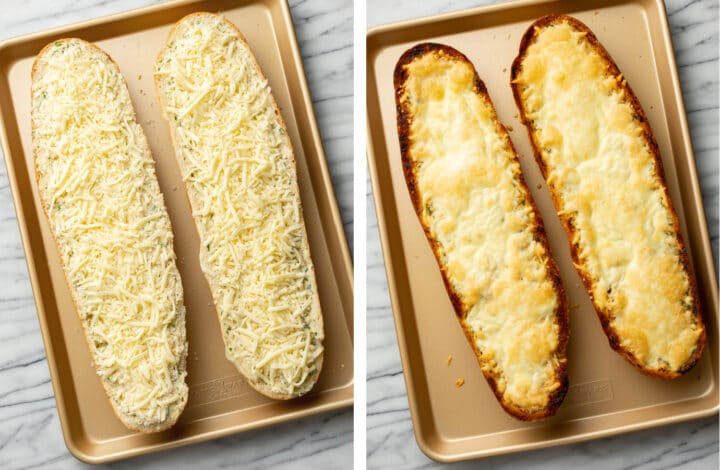
Top with the mozzarella, and then bake. Broil until golden and bubbly. It can go from golden to burned in a hurry, so be sure to check it often when broiling. Sprinkle with chopped parsley if desired, cut into slices, and enjoy right away.
Tools for this recipe
Check out Natasha’s favorite kitchen essentials, gadgets, and cookware!
- Mince the garlic cloves yourself with a garlic press. No peeling needed!
- Grate the cheese from blocks rather than using the pre-grated kind for maximum taste. I like this Zyliss grater.
- Here are the baking sheets pictured and my fave bread knife.
Substitutions and variations
- Try swapping the mozzarella for cheddar or another easy-melting variety such as a Mexican blend or Monterey Jack.
- You can definitely make it with Homemade Roasted Garlic if you prefer.
- I like to use a loaf of French bread, but any fresh loaf could be used. Try a baguette, a loaf of sourdough or ciabatta, etc.
- If you want more of a herby taste, feel free to experiment with adding individual herbs (fresh or dried) vs. the all-purpose blend that I use to give it a fairly subtle herb flavor!
What to serve with garlic bread
- It’s fantastic with Italian American favorites like Baked Ziti, my Italian Meatball Soup, or this Classic Chicken Parmesan recipe!
- For some vegetarian options, pair it with Spinach and Ricotta Stuffed Shells or this Alfredo Tortellini Bake. We also love serving it before a meal with this Easy Marinara Sauce for dipping it into.
- Whatever main dish you serve it with, it’s also awesome with a salad topped with this Easy Homemade Caesar Dressing to make a hearty meal.
Leftovers and storage
- I recommend eating it within a day or two max of making it so that it doesn’t dry out. For food safety reasons, it is best to refrigerate leftover cheesy garlic bread because of the dairy.
- To reheat it, loosely wrap it in foil (cheese side up) and warm it in the oven at 350F for 10-15 minutes. If desired, carefully broil to crisp it up again. This blog decided to test various methods for reheating garlic bread, so you can check out the article if you’re interested in her findings!
- I don’t recommend freezing cooked garlic bread. It just isn’t the same after thawing.
I’d be thrilled to hear from you in the comments below if you made this easy garlic bread or have any questions! You can also tag me #saltandlavender on Instagram.
Extra Cheesy Garlic Bread
Ingredients
- 1/2 cup butter (1 stick) softened
- 4 cloves garlic minced
- 1 teaspoon garlic powder
- 1/2 teaspoon Italian seasoning
- 1 tablespoon chopped fresh parsley + extra for serving
- 1/4 teaspoon salt
- Pepper to taste
- 1 (16 ounce) loaf French bread
- 1 cup freshly grated parmesan cheese
- 2 cups shredded mozzarella cheese
Instructions
- Take the butter out of the fridge at least an hour prior to starting the recipe.
- Preheat your oven to 400F and move the rack to the top third of the oven.
- Add the butter, garlic, garlic powder, Italian seasoning, parsley, and salt & pepper to a small bowl. Mash together with a fork until well combined.
- Cut the loaf of bread in half horizontally (try to get the two halves as equally sized as possible) and place each piece cut-side up on a baking sheet.
- Spread the butter over the cut side of each half of bread, then top each half with the parmesan, followed by the mozzarella.
- Bake for 12 minutes, then broil for a few minutes (watch it carefully so it doesn't burn!) until the cheese is golden and bubbly.
- Cut into slices and serve immediately with extra parsley sprinkled over top.
Notes
- Serving size really depends on how much people eat. Make it a meal for 2-4 with a salad, or serve it as an appetizer/one of several dishes at a gathering.
- Feel free to omit the extra salt if you’re sensitive to salt or prefer using salted butter.
- This recipe is also on page 239 of the Salt & Lavender: Everyday Essentials cookbook.
Nutrition
Nutrition information is automatically calculated, so should only be used as an approximation.
© Salt & Lavender Inc. Content and photographs are copyrighted. Sharing this blog post is much appreciated, but copying and pasting full recipes without authorization to social media is strictly prohibited.


This was soo good! Very cheesy and tasted amazing with her one pot Italian sausage pasta recipe.
😀
The best garlic bread I’ve ever had! Better than a restaurant!
I’m thrilled to hear that!! 😀
This was the best garlic bread! It was so good we wrapped the leftover bread in tin foil and put it in the frig. When we warmed it up in the oven once again it still tasted Fabulous! The next time I make it I will freeze half of it and cook the other half (I cook for two people.).
Amazing! Thank you so much, Becca.
Was craving cheesy garlic bread and came across this recipe. Easy recipe to follow and create! I didn’t want too much of an herby taste so I only used 1/4 tsp Italian seasoning. Loved the recipe, it was definitely delicious. Dipped it in pizza sauce made it even better 🙂 Thank you for this recipe!
I’m so happy it was a hit, C!!! 😀 Thank you!