This post may contain affiliate links. Please read our disclosure policy.
This easy Jiffy corn casserole recipe is a cozy side dish for everything from weeknight dinners to holiday meals! It’s simple to make and just like the one you grew up with.
Love corn? Try my Creamy Corn Chowder or Easy Creamed Corn next.
Why you’ll love it
This classic American corn casserole has been around forever, and using Jiffy mix is a tried and true shortcut. You need just a handful of pantry ingredients, and it turns out perfectly golden and fluffy every time even for people who can’t bake (me).
You’re not doing Thanksgiving, Easter, or Christmas right if you don’t have this simple corn casserole on your holiday table. And it’s so hassle free to throw together, you might as well make it any old weeknight for a versatile and comforting side dish!
Is this the same as corn pudding?
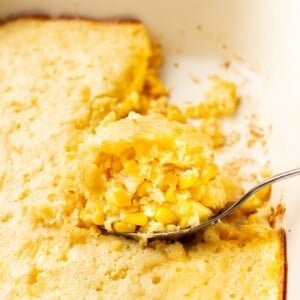
- A traditional corn casserole is somewhere between cornbread and corn pudding texture-wise. It’s quite a bit more moist than cornbread, and it’s kinda creamy inside. It’s also a little sweet but still considered a savory side dish.
- Jiffy brand itself invented this one in the 1970s and called it spoon bread casserole, but we think we’ve perfected it in our version!
What you’ll need
- Butter – for that irresistible buttery base
- Eggs – to make it fluffier and bind everything together
- Sour cream – for even more richness
- Corn – we’re using cans of both creamed corn and kernels for flavor and texture. It’s how the original Jiffy’s recipe did it.
- Jiffy corn muffin mix – our convenient shortcut! It contains lard, so it’s not vegetarian. They do have a vegetarian mix, so go with that if you need it to be fully plant based.
How to make corn casserole
This is an overview with step-by-step photos. Full ingredients & instructions are in the recipe card below.
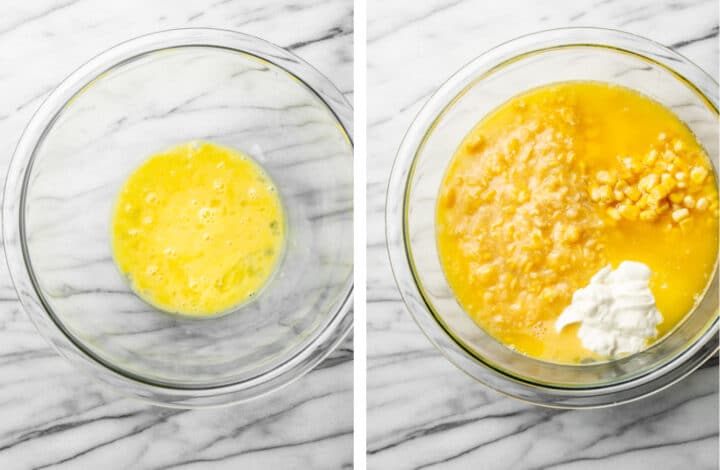
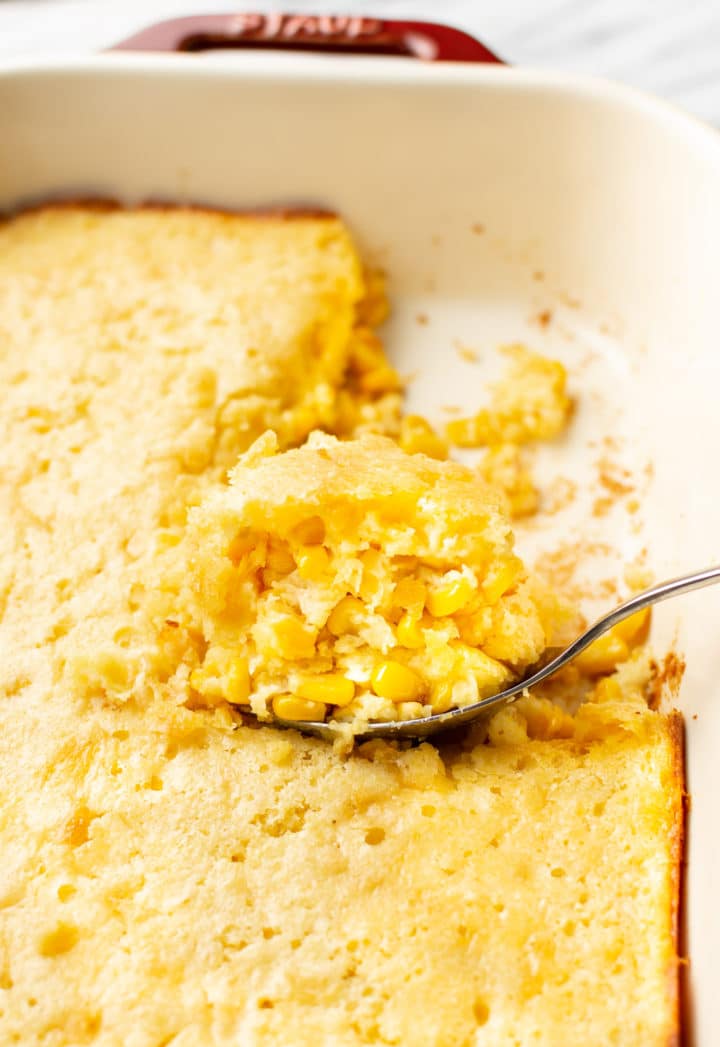
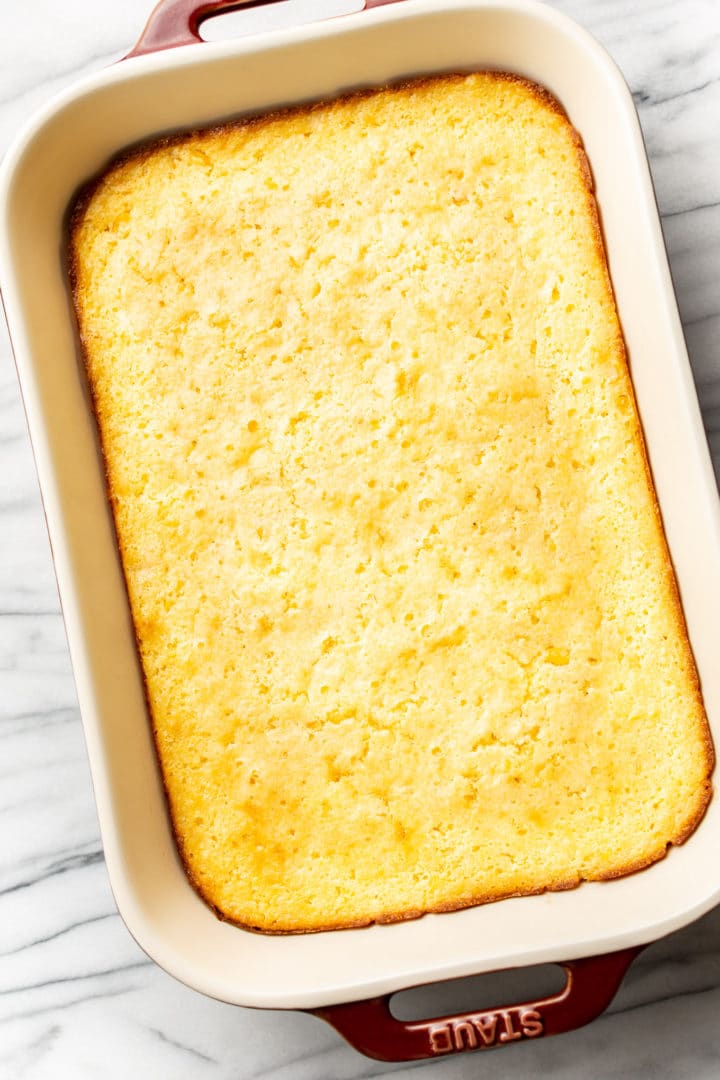
Start by melting the butter, preheating your oven, and greasing a 9×13 baking dish. To a mixing bowl, add the eggs and beat them with a fork, followed by the sour cream, cans of corn, and melted butter. Stir until smooth.
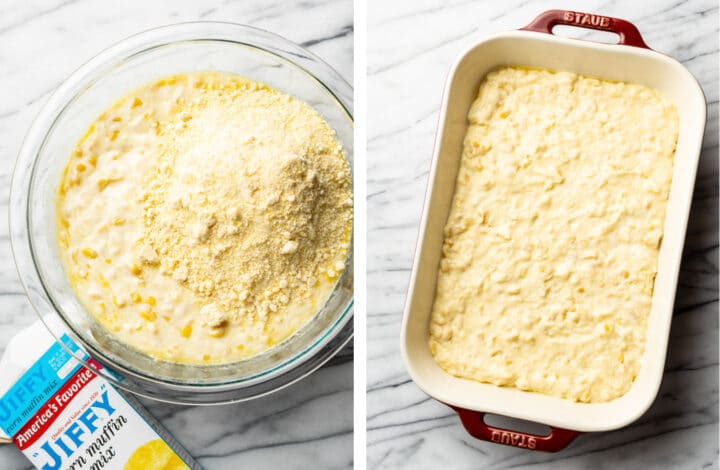
Add in the corn muffin mix, and stir until combined. Pour the batter into the casserole dish and smooth it out. Bake until the middle is set. You can easily test this with a toothpick that comes out clean.
How to make it ahead
- It’s easy to make corn casserole a day or two in advance. Prepare up until the baking step, and then cover tightly and refrigerate. Take it out of the fridge to warm up on the counter for at least 30 minutes, and then bake as directed. You may need to give it a touch longer. That’s it!
Tips for success
- Sizes of cans of corn can vary. Here in Canada most canned corn kernels come in the 12 oz. size. This casserole is pretty flexible as long as you’re in the same ballpark!
- You add the dry Jiffy mix right into the batter, ignoring the directions on the package.
- I greased the baking dish with cooking spray since the casserole does tend to stick a bit.
- I recommend letting the ingredients warm up on the counter for a bit prior to starting the recipe for best results. Room temperature is good.
Substitutions and variations
- Try adding some shredded cheddar. I’d mix in a cup or so into the batter, or you could even melt it on top.
- Drained canned green chilies are a fun way to amp up the flavor even more, or even some crumbled up Oven Cooked Bacon would be great.
- If you want a sweeter version, try adding a tablespoon or two of sugar to the batter.
What to serve with it
- Corn casserole is the ideal side dish to so many main courses any time of the year. For meat options, we pair it with Roast Chicken (Lemon & Herb), my Baked Pork Tenderloin, and Easy Meatloaf often.
- If you’re making it for Thanksgiving, you’re going to want to try it with my Easy Roast Turkey recipe with lots of Turkey Gravy!
Leftovers and storage
- It will keep for 5 days in the fridge in an airtight container.
- Or you can freeze leftovers for up to 3 months. I like to put it into individual portions for ease.
- You can reheat it in the oven or microwave in short increments until warmed through.
I hope you will love this creamed corn casserole! If you made it, leave me a star rating and review in the comments below.
Jiffy Corn Casserole
Ingredients
- 1/2 cup butter (one stick)
- 2 large eggs
- 1 cup sour cream
- 1 (15 fluid once) can creamed corn
- 1 (15 fluid ounce) can corn (kernels) drained
- 1 (8.5 ounce) package Jiffy Corn Muffin Mix
Instructions
- Melt the butter (microwave or stove).
- Preheat the oven to 375F and move the rack to the middle position. Grease a 9×13 casserole dish.
- In a medium-to-large mixing bowl, add the eggs (beat them with a fork), then the sour cream, creamed corn, canned corn, and melted butter. Stir until smooth.
- Stir in the corn muffin mix (make sure it's smooth but don't over-mix).
- Pour the batter into the casserole dish and smooth it out.
- Bake, uncovered, for 40-50 minutes or until the middle has set and the top is golden (I bake mine for 45). Keep in mind that ovens and baking dishes can vary so timing isn't exact. I use a ceramic casserole dish.
- Rest 10 minutes prior to serving. The texture of corn casserole is moist and creamy, so it won't be as firm as cornbread. I find it easiest to use a serving spoon to scoop it out into individual portions.
Notes
- If possible, allow ingredients come to room temperature prior to starting this recipe.
- You add the dry Jiffy mix right to the batter (ignore the instructions on the package).
- Adapted from Jiffy’s spoon bread casserole.
Nutrition
Nutrition information is automatically calculated, so should only be used as an approximation.
© Salt & Lavender Inc. Content and photographs are copyrighted. Sharing this blog post is much appreciated, but copying and pasting full recipes without authorization to social media is strictly prohibited.


I was surprised at how good this tasted, and how easy it was to make!!! Perfect side to take on a pot luck or for a holiday meal. I added sharp cheese and it was a hit. Easy, kids love and cheap to make.
Thanks, Scott!!
Recipe times 2 how many minutes?
Hi Jody! I would probably use 2 baking dishes. If using one, you’d definitely have to add on more time, but I am unsure how much since I’ve never tested it.