This post may contain affiliate links. Please read our disclosure policy.
This easy gremolata recipe is a bright, tangy, and herbaceous sauce that’s so simple to make! It’s wonderful with steak or anywhere that needs a punch of freshness.
You may also like my Green Goddess Dressing or Really Easy Pesto Recipe next.
Why you’ll love it
Gremolata is a classic Italian condiment with very few ingredients that you’ll want to put on everything! Traditionally it’s used with ossobuco (a veal dish), but you can pair it with steak, grilled meats, fish, roasted vegetables, etc. I’ve even used it as a dip with leftover pizza.
Wondering what the difference is between gremolata and Chimichurri? Both are zesty parsley and garlic sauces, but the latter is Argentinian and has more ingredients and uses vinegar instead of lemon juice. I can’t decide which I like better with my steak!
What you’ll need
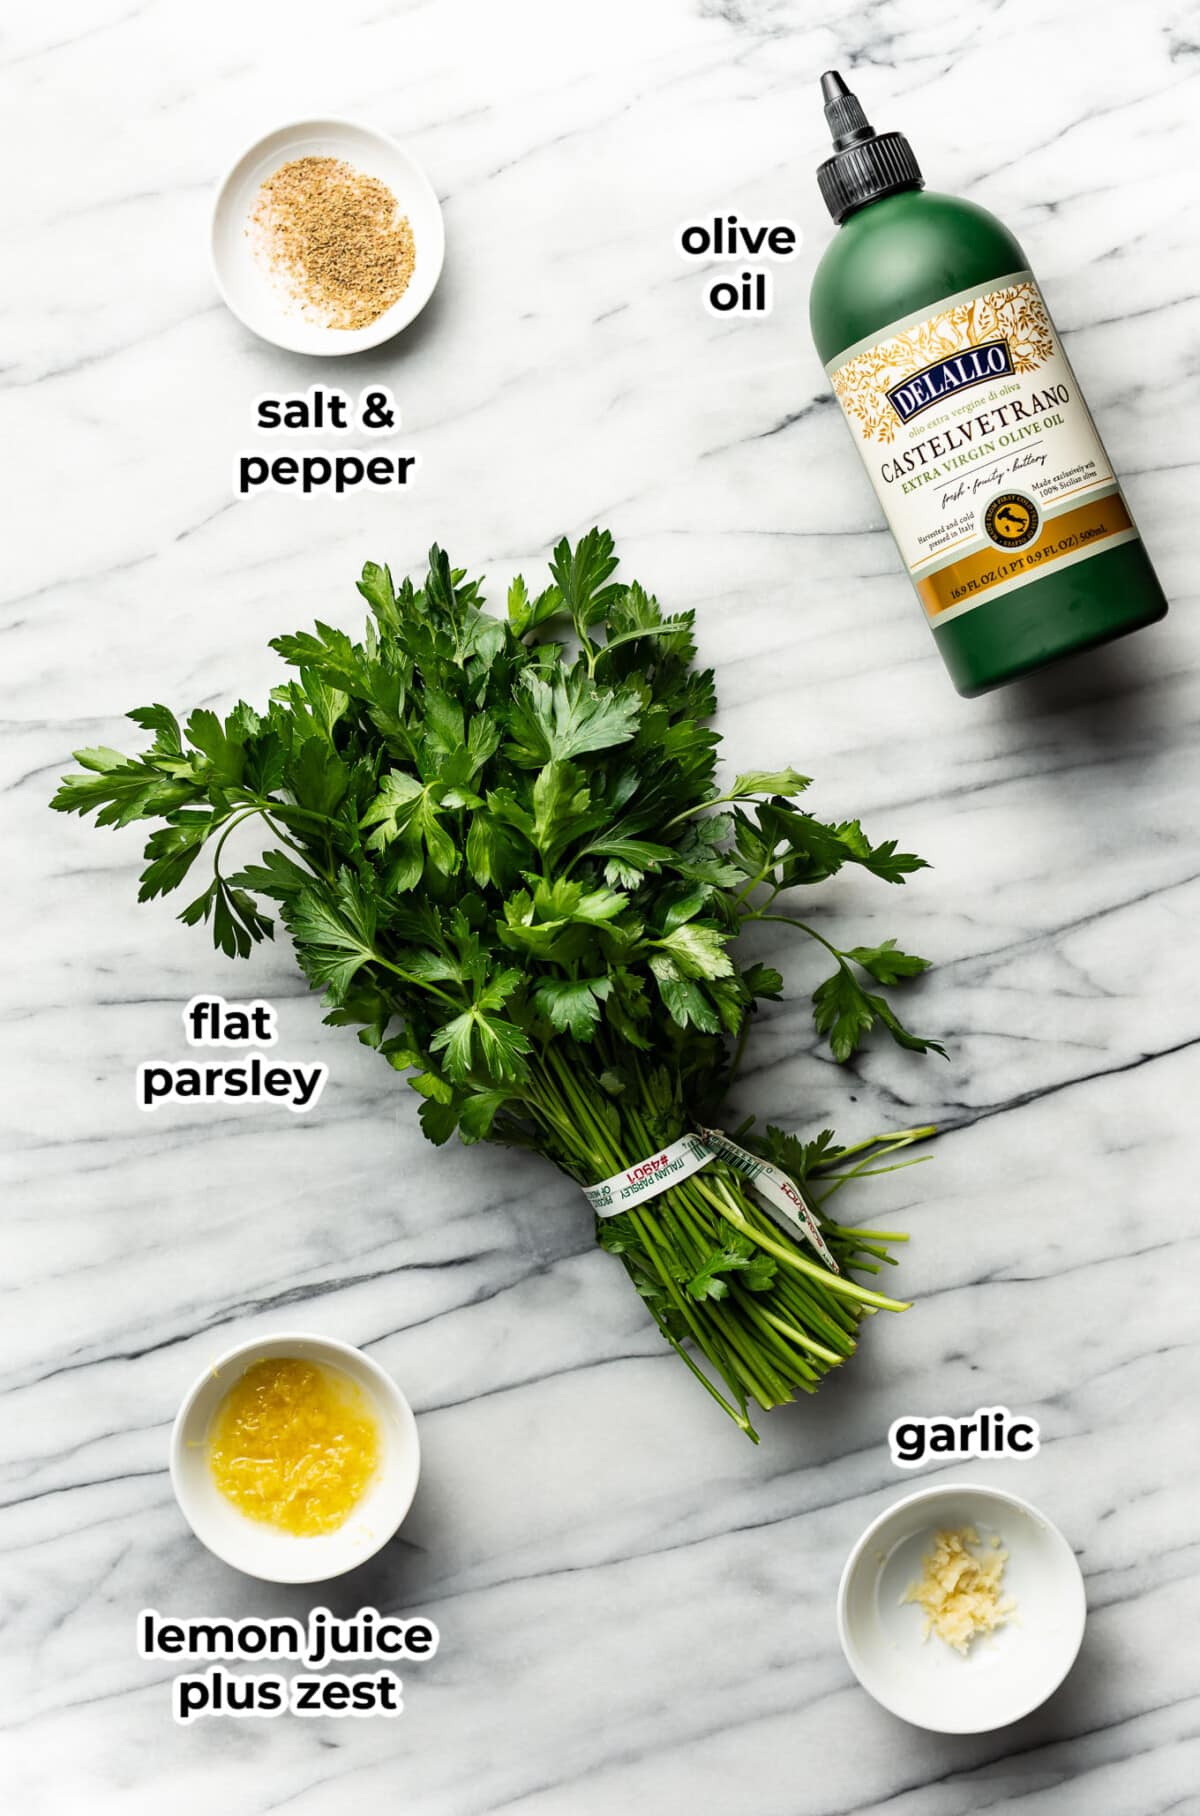
- Parsley – we’re using flat (Italian) parsley. Curly is for decoration, and flat is for flavor!
- Garlic – for lots of savory, aromatic flavor
- Lemon juice plus zest – gremolata traditionally is extra citrusy because of the zest
- Salt & pepper – to bring out the flavors
- Olive oil – it turns it into a luxurious, spoonable sauce that’s more viscous and tastes richer. It also balances the acidity.
Helpful tips
- Make sure to use a good-quality olive oil for this one since you’ll definitely be able to taste it.
- Take care to not zest too much into the pith (the white part) since that’s bitter.
How to make gremolata
This is an overview with step-by-step photos. Full ingredients & instructions are in the recipe card below.
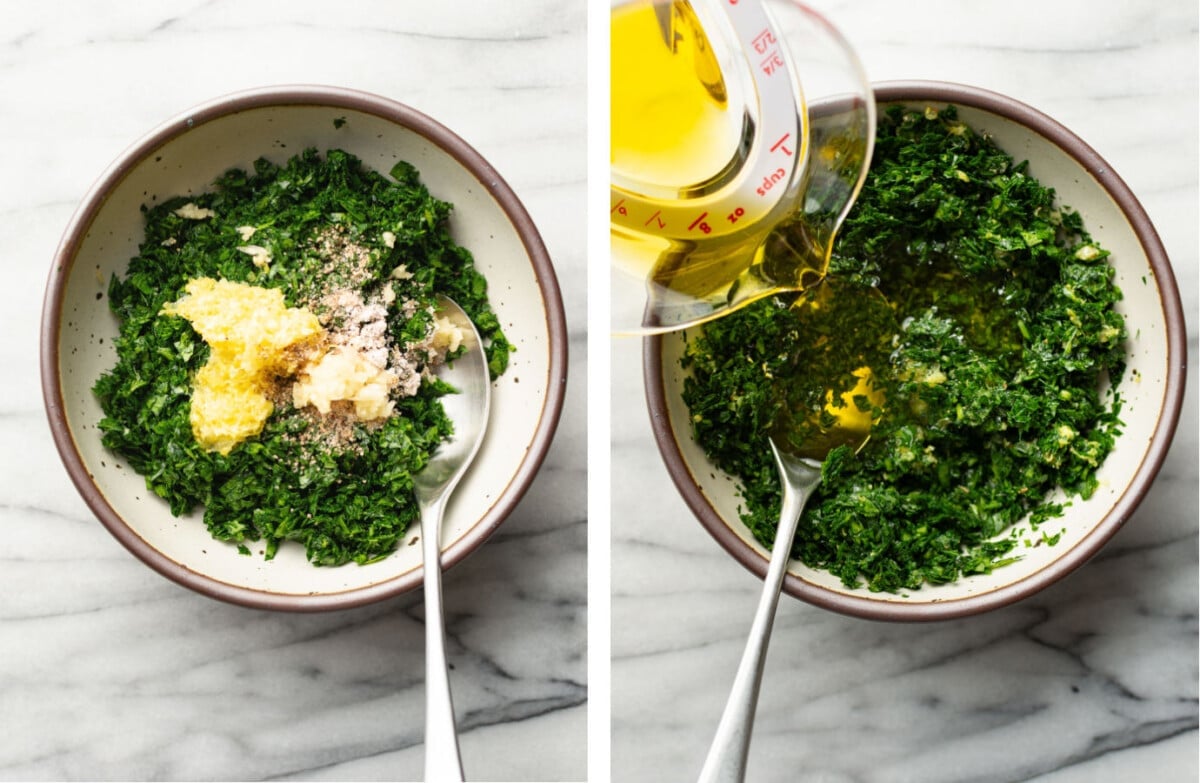
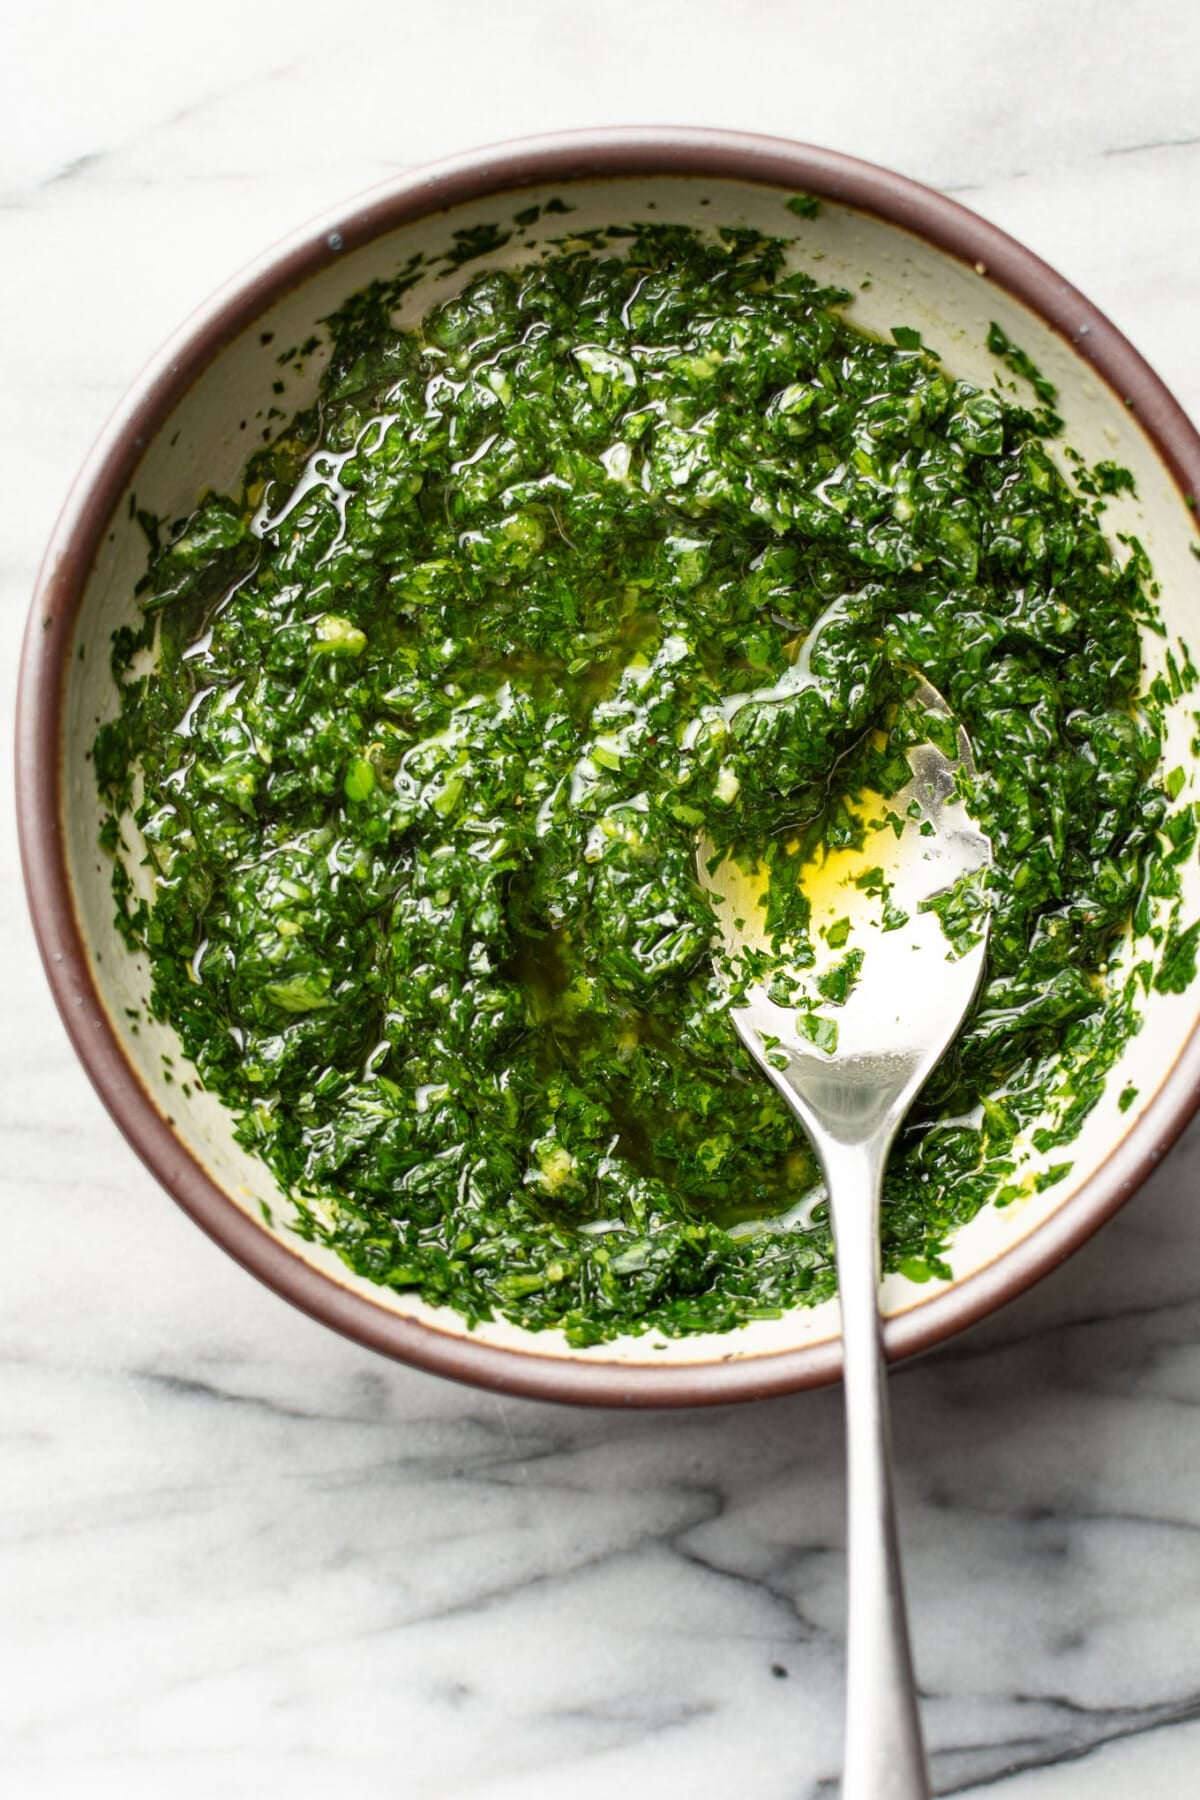
Discard the tough parsley stems, and chop it up. Add to a small bowl. Combine with the garlic, lemon juice/zest, and a generous amount of salt & pepper, followed by the olive oil. Give it a taste, and adjust as necessary. Refrigerate to let the flavors meld if desired.
Tools for this recipe
Check out Natasha’s favorite kitchen essentials, gadgets, and cookware!
- Use a sharp chef’s knife and a sturdy cutting board since there’s a good amount of chopping here.
- I use a Microplane to zest the lemon.
- Here’s my handy garlic press.
Substitutions and variations
- Traditionally gremolata can be sprinkled on dry like a garnish and is made without olive oil, but I prefer versions that use it and are spoonable. You absolutely can leave it out if you want!
- Add crushed red pepper flakes or a finely chopped anchovy fillet for a little kick and some umami flavor.
- If you want more of a blended version, throw everything into your food processor.
What to serve with gremolata
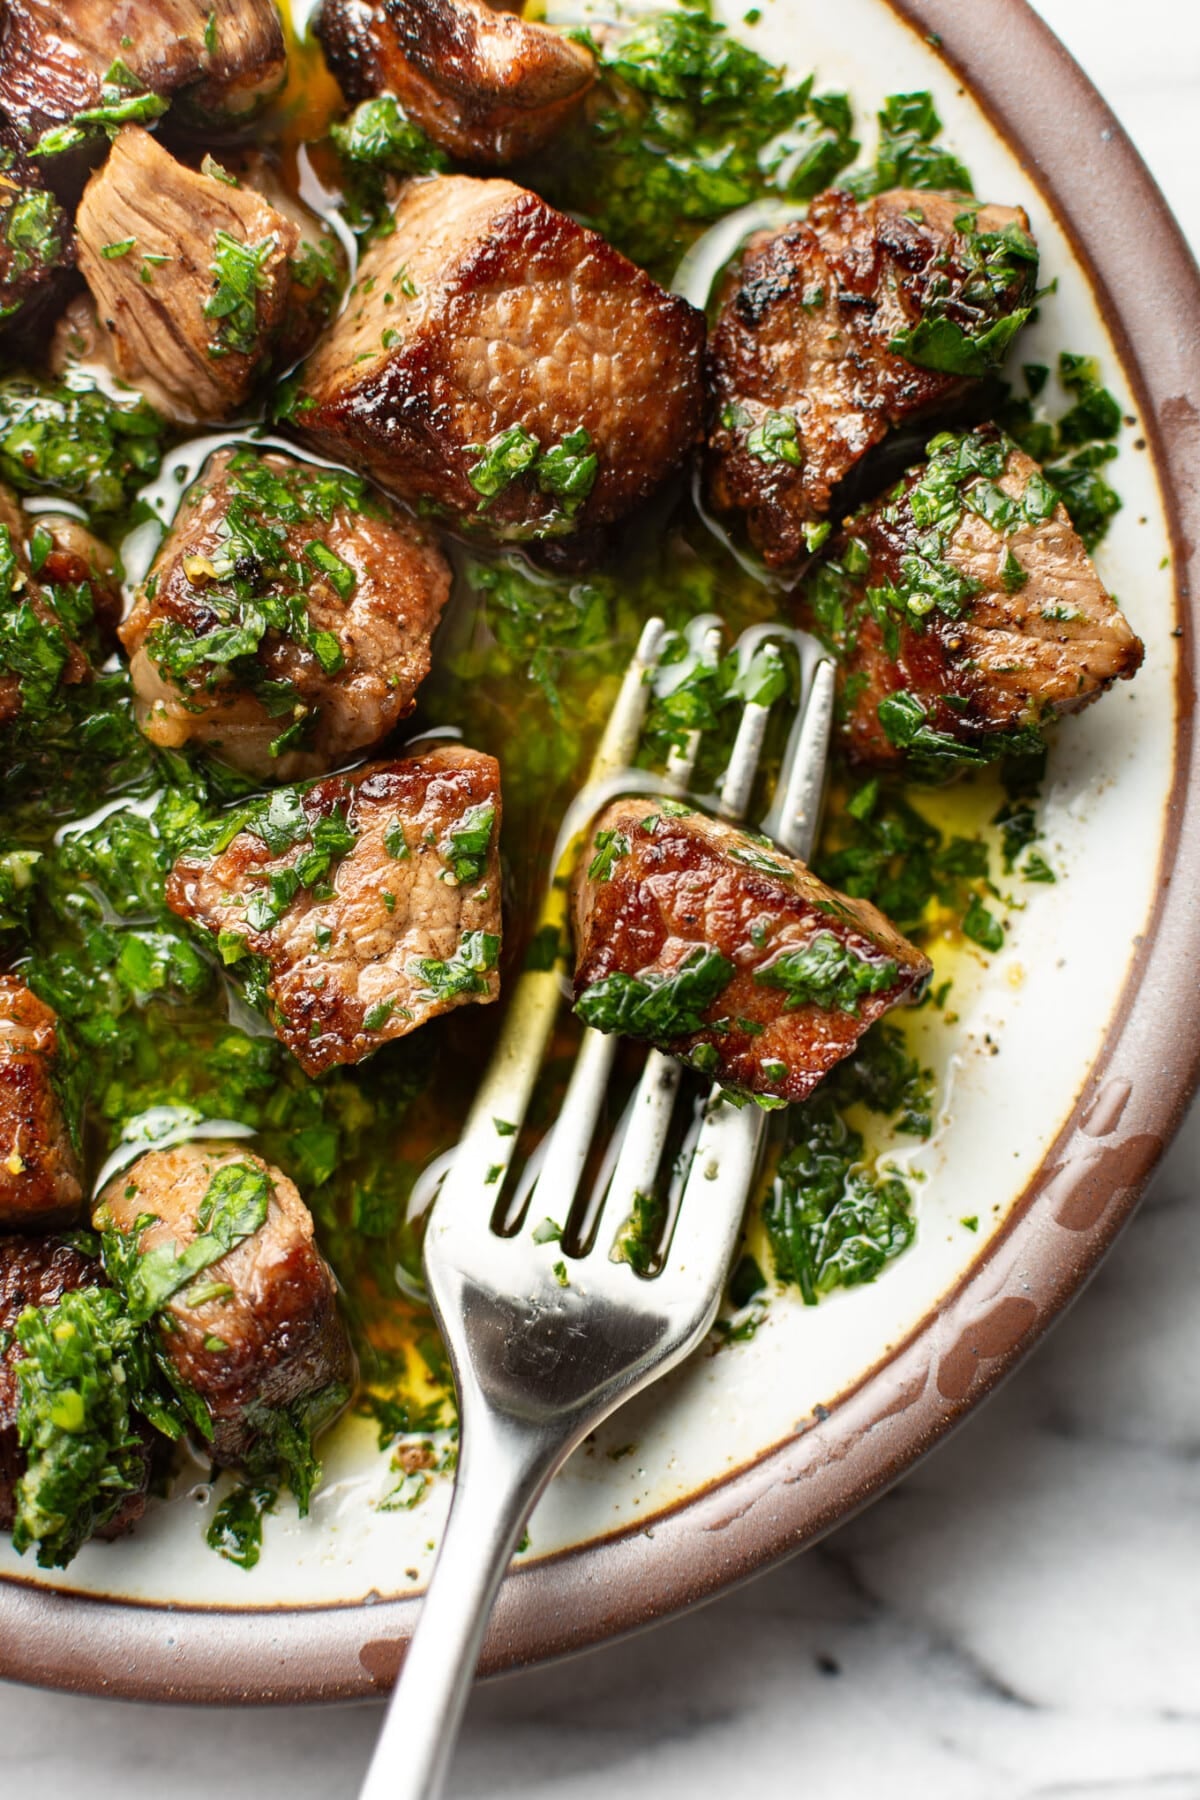
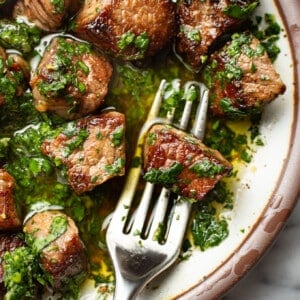
- It’s pictured with some quick steak bites I made by searing pieces of ribeye in a hot skillet. For more detailed cooking instructions, see our Garlic Butter Steak Bites. I also like it with my Ribeye or Filet Mignon.
- Choose your favorite grilled meats or vegetables or seafood. It’s also good with my Easy Pan Seared Salmon and Baked Chicken Breast and Easy Roasted Potatoes and Carrots or Easy Roasted Sweet Potatoes.
- Dip some crusty sourdough bread into it!
Leftovers and storage
- Store leftover gremolata in a tightly covered container for up to 3 days in the fridge.
- I suggest giving it a stir before serving. You may want to let it warm up a bit before serving.
- It’s best fresh, but you could freeze this one in an ice cube tray. The olive oil will help the herbs from oxidizing.
What did you serve my gremolata recipe with? Talk to me in the comments below! Or tag me on Instagram stories so that I can see your photos.
Gremolata
Ingredients
- 1 bunch fresh flat-leaf parsley tough stems removed
- 1-2 cloves garlic minced
- 1 tablespoon lemon juice + zest of 1 lemon
- Salt & pepper to taste
- 1/3 cup olive oil + more if needed
Instructions
- Chop the parsley to your desired texture and add it to a small bowl. Stir in the garlic, lemon juice + zest, and be generous with the salt & pepper.
- Pour the olive oil in and give it a stir. Add more oil if desired. Taste and adjust as needed. Enjoy right away or let it sit in the fridge for a few hours for the flavors to meld more (I like to let it warm up a bit before serving, though).
Notes
- See blog post above the recipe card for more variations and serving suggestions!
Nutrition
Nutrition information is automatically calculated, so should only be used as an approximation.
© Salt & Lavender Inc. Content and photographs are copyrighted. Sharing this blog post is much appreciated, but copying and pasting full recipes without authorization to social media is strictly prohibited.


VERY GOOD RECIPE
Thanks, Peter!! 😀
Delicious! I went to a restaurant once where they served warm freshly baked bread with gremolata.
So good!